Bloggers, influencers, and content creators, we all have one thing in common; Content and consistency are paramount! Sometimes it can get overwhelming and it’s incredibly easy to burn out. This is why I’m just a huge believer in planning and batching content for six months in advance. Now, I know that might sound daunting, but trust me, this can be done in ONE DAY! Don’t believe me? Keep reading and I’ll show you how!
Supplies You Will Need To Batch Content
First things first, you’ll need some supplies! A notebook and pen are great, but it just won’t cut it! Here’s what you’ll need and I’ll link them as well:
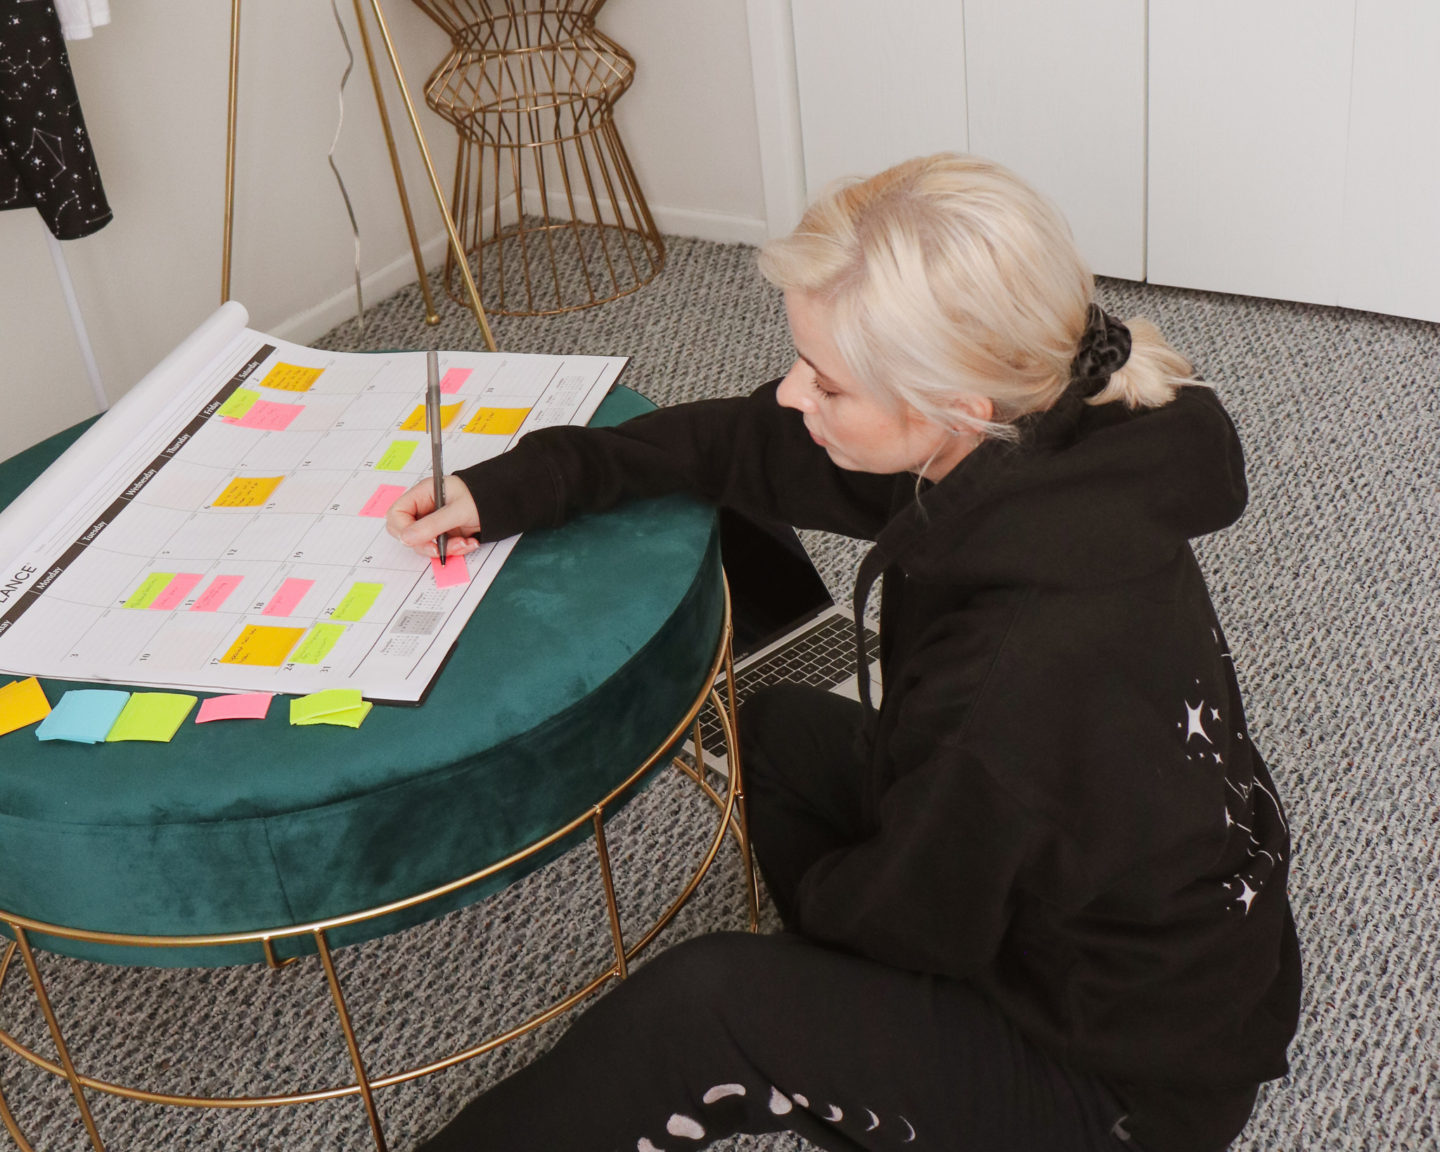
- A large desk calendar – A desk calendar is great because you have tons of space for notes and you can use sticky notes on them.
- Sticky Notes – Sticky notes are important for this process! You’ll want to buy a pack, or two, or the multi-packs with different colours. Each colour will represent a different platform. I’ll get into this in more detail down below.
- A pen – You’ll be doing a bit of writing.
- A notebook – This is for jotting down any ideas that randomly pop into your head!
Now that you have your supplies, let’s get planning!
Batching Blog Content
Batching six months of blog content sounds daunting but trust me, it’s not as scary as it seems! Here’s how you do it:
Step 1: Choose a colour for “blog post” sticky notes
As I mentioned above, you’re going to want to use different coloured sticky notes. As A blogger, I’m sure you use other platforms such as Instagram or Twitter. This will help you keep everything organized! For blog posts, I use yellow.
Step 2: Think about holiday content
If you’re planning the last six months of the year, I’m sure it’s easy to think of a bunch of holiday content. The first half? Not so much. This is where a little googling comes in handy. When you think of a holiday blog post idea, write it on a sticky note a place it on the day you’d ideally like to publish it!
Step 3: Add filler content
Now that your holiday posts are taken care of, it’s time to add some filler. Depending on how often you publish blog posts, this may or may not be necessary. However, if you need some filler post ideas, I have a blog post with over 1,000 post ideas of all niches. Click here to give that a read! Once you have all of your sticky notes on the calendar, feel free to swap some around until you like where everything is posted. This is why I love the sticky notes, it’s easier to plan because you can just peel them off and move them.
Step 4: Start making rough drafts
Now I know you might think I’m insane for this one, but I promise you you’ll thank me later. This won’t take as long as you’d think, especially if you use a platform like WordPress where they use the block system. Here’s what I want you to do:
- Open up a new draft.
- Write the blog post title
- Insert all of the blocks you usually use. So if your posts start with a photo, insert that block.
- Write a brief synopsis of what your post is about.
- Write all of your headings.
- Save it.
Here’s an example! Add any of the blocks you usually use. Nothing fancy, just quick facts and ideas. You can do all of your fine-tuning when you’re actually ready to write the post.
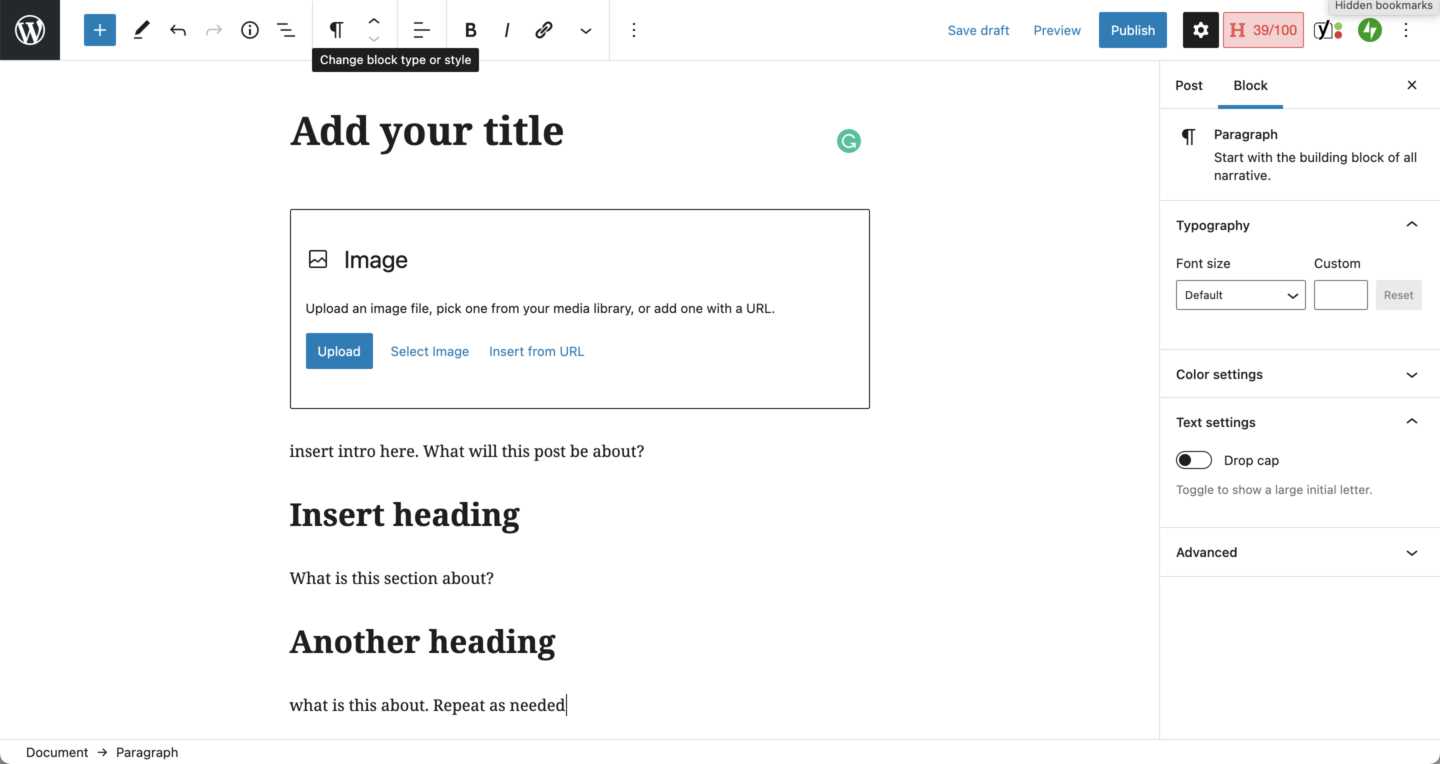
This sounds like a waste of time but I promise you it’s not. When life gets in the way and you start falling behind, you’ll be glad that all you have to do is input information and edit. It’s saved my butt countless times!
Batching Social Media Content
Like blogging, staying consistent on social media is incredibly important! If you’re looking to grow your platform, you’ll need to consistently put out beautiful content. So how do you do that? Here’s how:
Step 1: Choose a colour of sticky note
Just like I mentioned above, it’s important to stay organized. So if you have multiple accounts you’re planning for, they all need a different coloured sticky note.
Step 2: Start with holidays and #SocialMediaHolidays
Just like blogging, it’s important to keep the holidays in mind. However, with social media, you get more holidays. They’re called Social Media Holidays and include days like National Cheese Lovers Day! Social Media holidays are great because they all come with their own hashtags and you know we love a good hashtag! To find out more about them and the yearly list, click here to head over to HubSpot for their full list! Also, if you’re struggling to come up with social media posts, check out my Ultimate Blogger Bundle. I’ve included over 200 social media post ideas in it!
Step 3: Shoot content in batches
If your Instagram posting schedule is every day, I’m sure you have a lot of content you need to shoot. This is why it’s a good idea to shot for multiple posts at one time. Do you have a couple of flat lays scheduled for the month? Shoot them at the same time. Do you need a friend to help you take outfit photos? Bring all of your outfits to the shoot and get them all done.
Step 4: Use a content scheduler
Using a content scheduler has changed my life. The one I’ve been loving lately is called Later. Later allows me to schedule my Instagram, Twitter, Facebook, and Pinterest from one place. It’s also helpful because I can easily move posts around to make sure my feed is looking great! Later has an amazing free plan and if you use this link to sign up, you’ll get an additional 10 posts a month!
I really hope you found this post helpful. Planning and getting head is so important when you’re in a creative field. If you still need help with content ideas, please check out my Ultimate Blogger Bundle! If you found this post helpful, I’d love it if you could share it with a friend. If you’d like to save this post for later, feel free to use the images below to pin on Pinterest!
Will this be your first time planning and batching six months on content? Let’s chat in the comments!
xo Little J
PIN IT


