One of my favorite places in a home is the kitchen. It’s the place where people gather, chat, and best of all, make delicious food! Now, anyone who knows me will know that, after a couple of years of looking at the same space, I get the itch to do a little updating. Above is a picture of my “Before” kitchen. Nothing wrong with it, it just needed to be brightened up a bit. As I’m sure many of you rent or have rented in the past, a complete kitchen renovation is out of the question. For those of you who own homes, you know that kitchen renovations can cost tens of thousands of dollars, which isn’t always in the budget. If you fit into those two categories, this is the post for you! Ready to see the “After” of my kitchen makeover?
BAM!
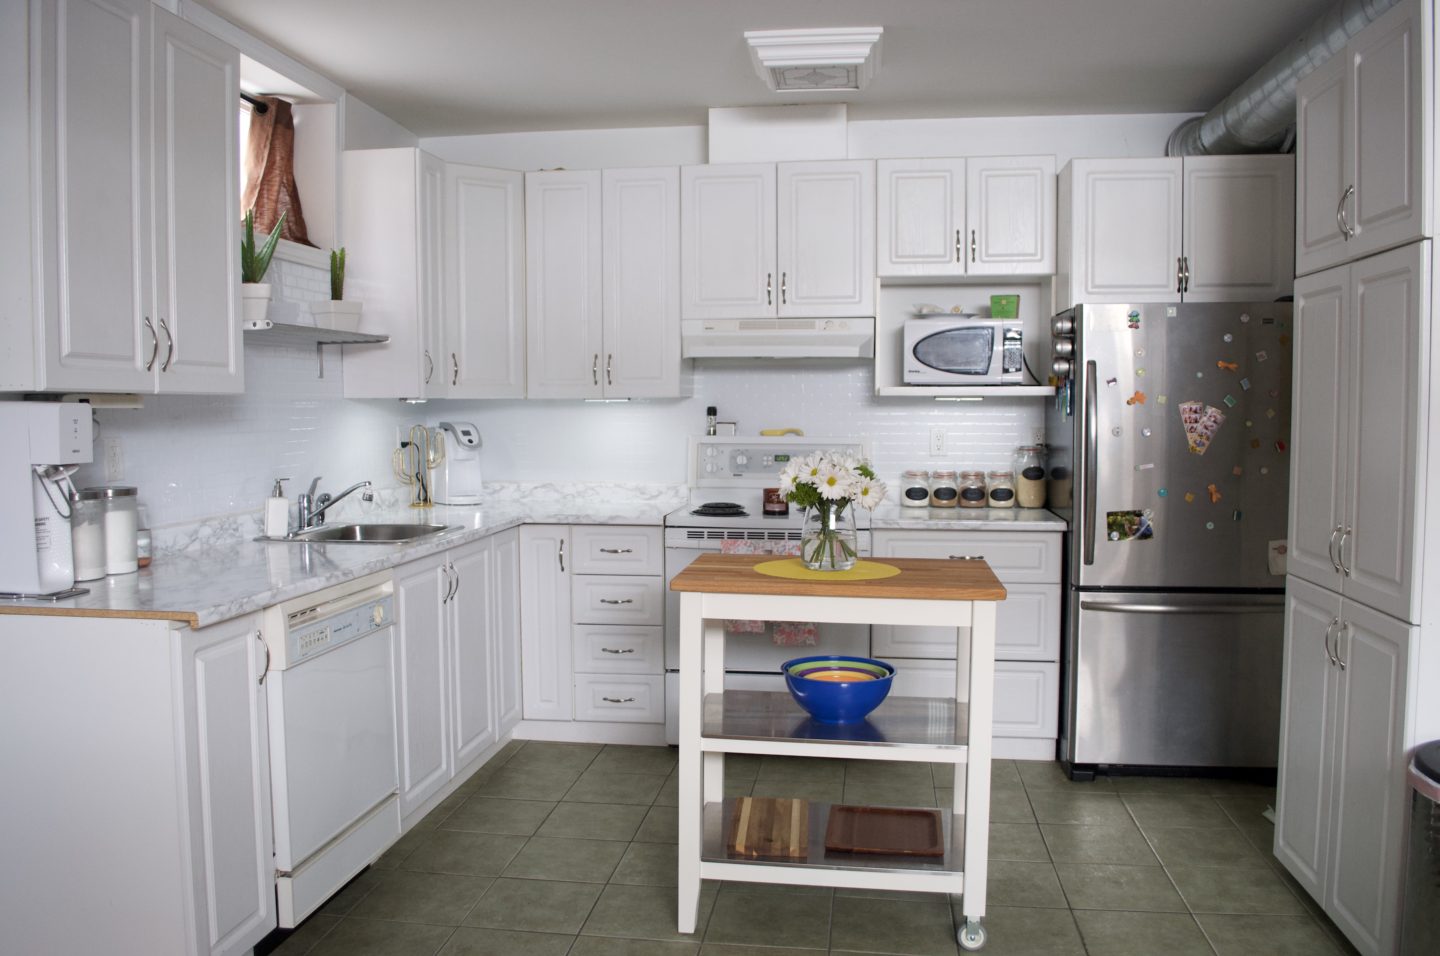
Quite the difference, right? It’s brighter, fresh, and not so… green. Would you believe me if I told you it only cost me $520? Well, it did! Better yet, it only took me a weekend to get it done! Intrigued? I thought you might be. Here’s how I did it! All of the materials I used will be linked at the bottom of this post!
Counter Tops
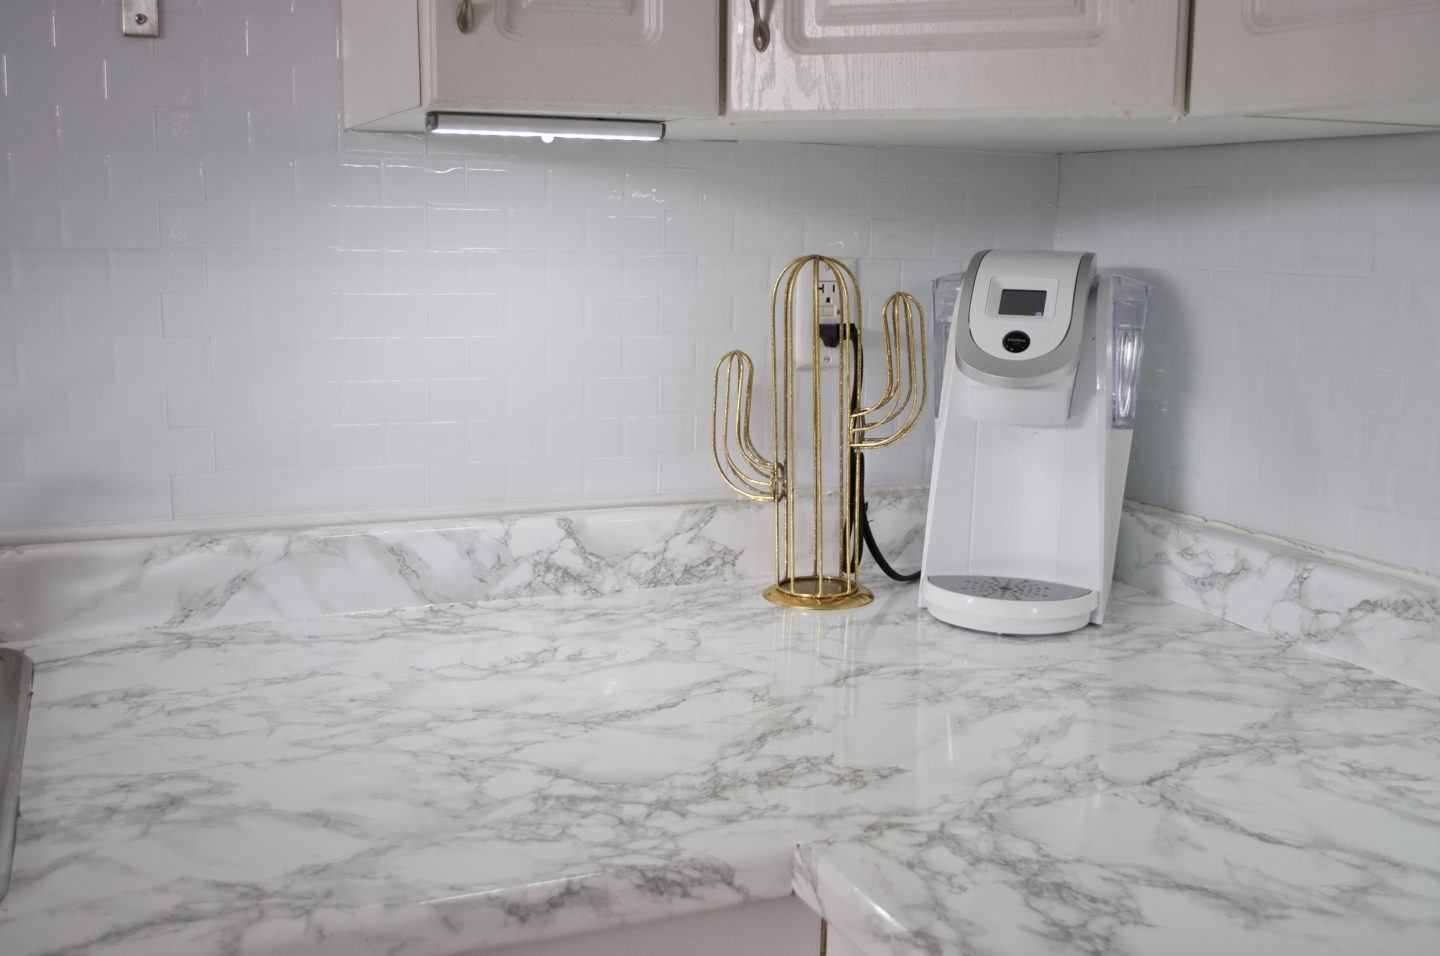
I’d have to say that the countertops are the biggest change in this makeover. Before, they were a dark green laminate with a subtle leaf print on them. Now, they’re bright white, shiny, marble! Ok, ok, so they aren’t marble but they look like it! This is all thanks to a product called D-C Fix Self Adhesive Film. It’s basically a giant sticker you put onto your countertop! I remembered that my mom used this in our home when I was younger and thought:
“My kitchen NEEDS this.”
I was right, I did need it. It’s amazing! You can literally use it on anything and it comes in all colours and textures.
How to apply it:
- Clean your countertops. It won’t stick to a dirty surface.
- Measure your counter. If you happen to have the “backsplash” piece, do that first. It’s easier to start there, trust me.
- Cut the film to the correct size. I like to make it a little bigger than I need because you can always cut the excess off.
- Remove two inches of the backing and stick it to your counter.
- Slowly remove more of the backing and stick on the adhesive. I like to use a credit card to smooth out any bubbles along the way. If you’re having a hard time with air bubbles, I recommend using a hair dryer as well. It helps move the air trapped inside.
- Repeat!
It’s really that easy! You’ll find it tricky to go around your sink though, just be patient!
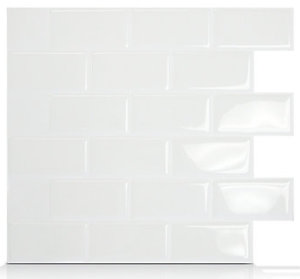
Backsplash
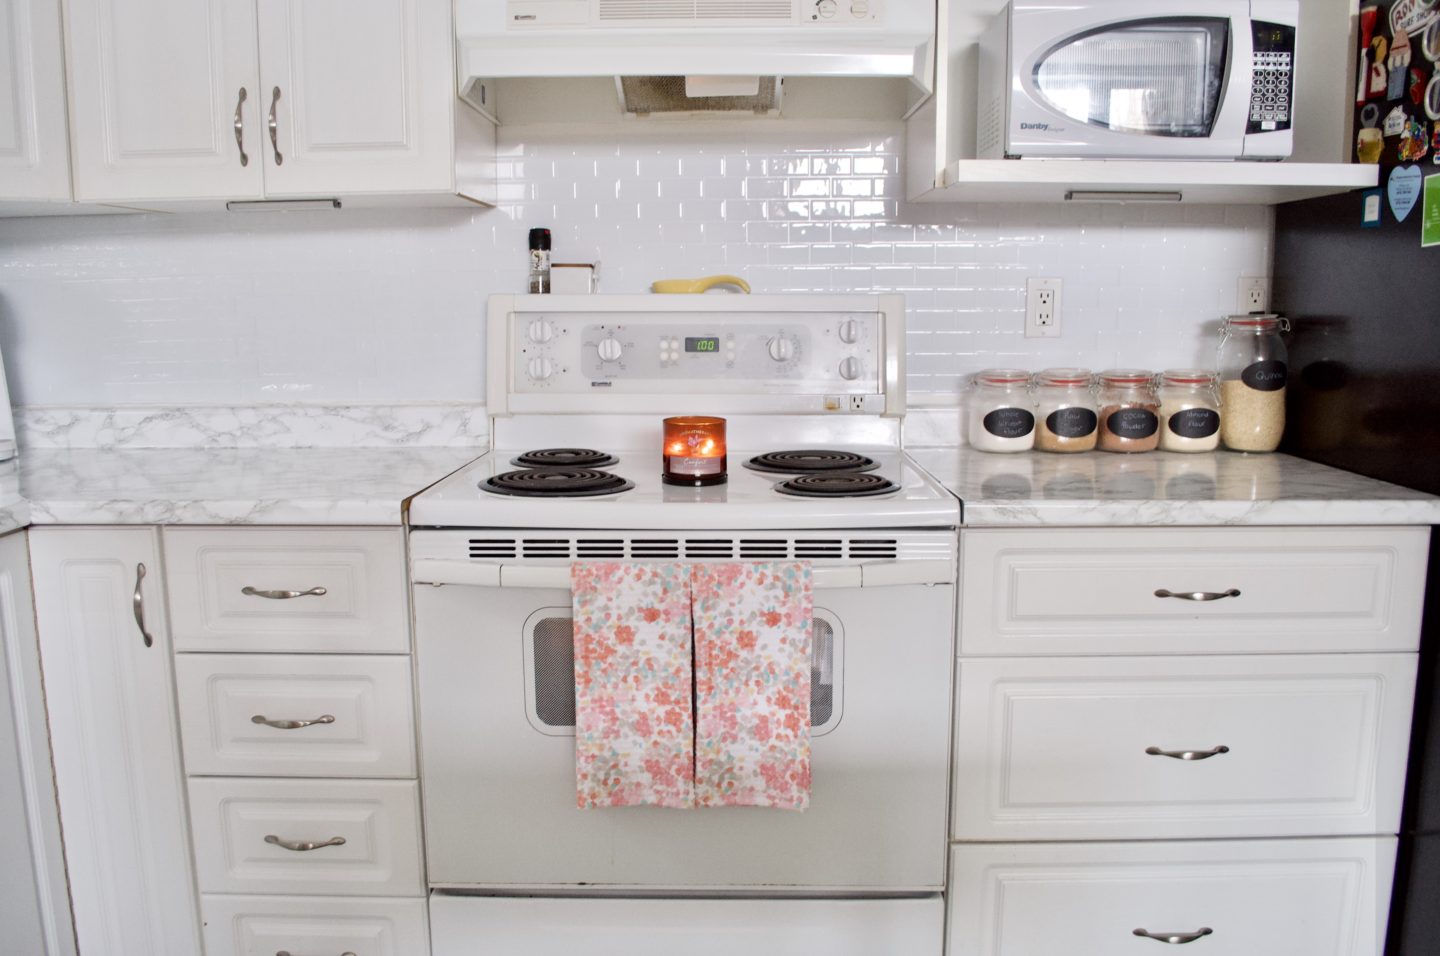
Before this makeover, my kitchen didn’t have a backsplash. I knew that to create a bigger impact, I’d need to put something on the walls. Tiling backsplash on wasn’t in the cards or my budget though. This is when I decided to use Smart Tiles, stick-on backsplash. Do you sense a theme here? I love a good sticker*. They come in all sorts of shapes, colours, and textures too!
*Side note: I used to have quite the extensive sticker collection. Multiple books filled with them, organized by type and theme, and never let anyone use them. Yep, I was THAT kid.
Here’s how you apply them:
- Clean your walls. Again, these will not sick to dirty or greasy surfaces.
- Start in the bottom corner. You’ll need to cut off one end of your tile so that they are flush with the wall.
- Stick it on!
- Repeat!
Trying to explain the process of installing the counter and backsplash is a little difficult through writing. Comment down below if you’d like to see a video of how it’s done!
Accessorize

This was probably one of my favourite parts! I love a good accessory, but in a kitchen, it needs to be functional. We don’t need anything taking up prime real estate if it’s not going to serve a purpose, right? Here’s what I added:
Metal Shelf
I had been wanting a shelf over my sink for ages! It was just a wasted space before and needed a little love. I got this one from Ikea, I’ll link it down below! I believe it was only $29.99 too. It was perfect for this spot and now I have the perfect place to put some plants and herbs!
Under Cabinet Lighting
Lighting can be super expensive and a pain to install. That’s why I was so excited when I came across some under cabinet lighting on Amazon! Not only were they inexpensive, but they were LED, rechargeable, and you guessed it… STICK ON! Quadruple win! They’ll be linked below, as usual.
That’s it, guys! Those four little changes completely changed the look of my kitchen. Once I was done, all I could think was that I wish I had done it sooner! I hope this post inspired you to take on your own kitchen makeover! Leave a comment down below if this is something you’ll be taking on!
xx Little J
Shop This Post Here!